Creating slime at home has become an incredibly popular activity for both kids and adults. It’s not just about fun; it’s also a great way to explore science, creativity, and even stress relief. Among the many slime recipes out there, making 3-ingredient slime without borax is one of the simplest and safest methods available. This guide will walk you through the entire process, from gathering your materials to troubleshooting any issues, ensuring that your slime-making experience is a resounding success.
Introduction to 3-Ingredient Non-toxic slime recipe Slime
Slime-making isn’t just a trend; it’s a fascinating way to engage in a hands-on activity that can be both educational and entertaining. The appeal of making slime is universal, whether it’s the squishy texture, the vibrant colors, or the satisfaction of creating something with your own hands. However, with concerns about the safety of traditional borax-based slime recipes, more and more people are turning to alternatives that are safer, especially for children. This article focuses on a foolproof method using just three ingredients: glue, baking soda, and contact solution.
The simplicity of this recipe makes it ideal for beginners and experts alike. Whether you’re looking to make slime as a quick after-school project or as part of a more elaborate science experiment, this guide will provide everything you need to know.
For those interested in selecting the best glue for slime-making, Elmer’s official website offers a range of glue types that work exceptionally well in slime recipes. Understanding the role of each ingredient will help you achieve the perfect slime consistency and ensure a successful outcome every time.
Why Choose a Borax-Free Recipe?
Borax has been a staple in many slime recipes for years, primarily due to its effectiveness as a binding agent. However, concerns about the safety of borax, particularly for children, have led to a growing interest in borax-free alternatives. While borax is generally safe when used correctly, it can cause skin irritation and other adverse reactions if handled improperly. This is especially concerning for young children, who may be more sensitive to the chemical.
By opting for a borax-free recipe, you can enjoy all the fun of slime-making without worrying about potential health risks. This recipe uses contact solution, which contains boric acid—a milder alternative to borax that is still effective in creating the desired slime texture. The result is a non-toxic, kid-friendly slime that is just as enjoyable to make and play with.
For additional safety tips when making slime, the American Academy of Pediatrics provides comprehensive guidelines that can help ensure a safe and enjoyable slime-making experience for everyone involved.
Ingredients Overview
1. Glue
The primary ingredient in slime is glue, and the type of glue you choose can significantly impact the final product. Elmer’s glue is the most popular choice for slime-making due to its consistent quality and availability. You can use either white school glue or clear glue, depending on the appearance you want for your slime.
- White Glue: This type of glue is ideal for creating classic, opaque slime. It’s perfect for adding colors and other mix-ins, as the solid white base allows pigments to show up vividly.
- Clear Glue: If you prefer a translucent, glossy slime, clear glue is the way to go. Clear glue creates a more gel-like consistency and works well with glitter and other light-reflecting additives.
The glue you use will also determine the stretchiness and durability of your slime. Higher-quality glues, such as Elmer’s, tend to produce better results in terms of both texture and longevity.
2. Baking Soda
Baking soda is the key to achieving the right consistency in your slime. It acts as a firming agent, helping to balance the pH level of the glue and allowing the slime to hold its shape. Baking soda is essential for preventing the slime from becoming too sticky or too runny.
The amount of baking soda you use can be adjusted depending on the type of slime you want to create. For a firmer slime, you can add a bit more baking soda. Conversely, if you prefer a stretchier slime, use slightly less. Baking soda is also an inexpensive and readily available ingredient, making it a convenient choice for slime-making.
3. Contact Solution
Contact solution is the final ingredient that brings your slime together. It contains boric acid, which acts as a mild activator, turning the glue into a stretchy, cohesive mass. When added to the glue and baking soda mixture, the contact solution causes a chemical reaction that transforms the liquid ingredients into a solid slime.
It’s important to note that not all contact solutions are created equal. For the best results, use a contact solution that contains boric acid and sodium borate. These ingredients are necessary for the activation process. If you’re unsure about which contact solution to use, check the label for these key components.
If you don’t have contact solution on hand, you can substitute it with saline solution. Just make sure it contains the same activating ingredients to ensure your slime comes together properly.
Step-by-Step Guide to Making 3-Ingredient Slime
1. Preparing the Materials
Before you begin, it’s essential to gather all your materials and set up a clean, flat workspace. Slime-making can get a little messy, so you might want to lay down some newspaper or a plastic tablecloth to protect your surfaces.
Materials Needed:
- 1 cup of Elmer’s glue (white or clear)
- 1 teaspoon of baking soda
- 2 to 3 tablespoons of contact solution
- Mixing bowl
- Spoon or spatula
Optional:
- Food coloring
- Glitter
- Essential oils (for scented slime)
Having everything prepared and within reach will make the process smoother and more enjoyable.
2. Mixing the Ingredients
Step 1: Pour the Glue
Start by pouring 1 cup of glue into your mixing bowl. If you’re adding food coloring or glitter, mix them into the glue at this stage. Stir until the color is evenly distributed.
Step 2: Add Baking Soda
Next, add 1 teaspoon of baking soda to the glue. This helps to thicken the mixture and start the activation process. Stir the baking soda into the glue until it is fully dissolved.
Step 3: Add Contact Solution
Slowly add 2 tablespoons of contact solution to the glue mixture, stirring continuously. As you mix, you should notice the slime beginning to pull away from the sides of the bowl and form a ball. If the slime is still too sticky, add an additional tablespoon of contact solution and continue mixing.
Knead the slime with your hands for a few minutes until it reaches the desired consistency. The slime should be stretchy, not sticky, and hold together well.
3. Adding Optional Elements
One of the joys of making slime is the ability to customize it to your liking. Here are a few ideas for making your slime unique:
- Food Coloring: Add a few drops of food coloring to your glue before mixing in the baking soda. This will give your slime a vibrant color. For a more subtle effect, you can add the food coloring after the slime has formed.
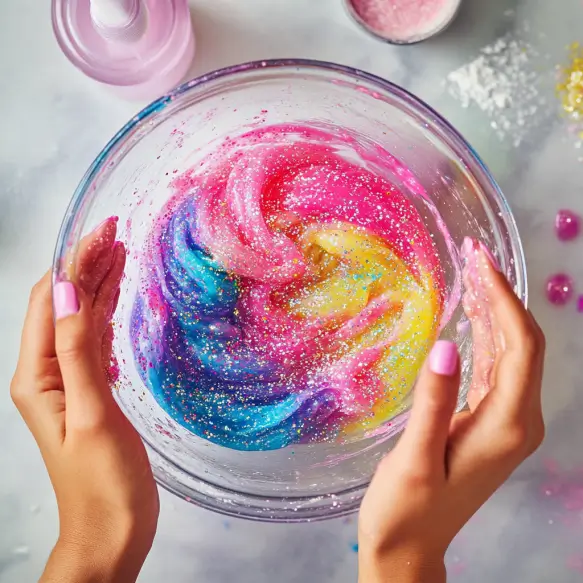
- Glitter: Glitter can add a fun, sparkly element to your slime. Mix it into the glue at the beginning, or fold it into the slime after it’s formed for a more concentrated effect.
- Essential Oils: To create scented slime, add a few drops of essential oil to your glue mixture. Popular choices include lavender, peppermint, and citrus. Not only will your slime smell great, but the scent can also provide a calming or invigorating experience during play.
Experiment with different combinations to find your favorite slime recipe!
Troubleshooting Common Slime Issues
Even with the best recipe, slime-making doesn’t always go according to plan. Here are some common problems you might encounter and how to fix them.
1. Slime Too Sticky?
If your slime is too sticky, it likely needs more contact solution. Start by adding a few drops at a time, kneading the slime after each addition. Be careful not to add too much at once, as this can make the slime too stiff.
Kneading the slime is an important step in reducing stickiness. As you work the slime, the contact solution will continue to activate, making the slime less sticky and more stretchy.
2. Slime Too Runny?
Runny slime is usually the result of too much liquid or not enough activator. To fix this, add a small amount of baking soda, about 1/4 teaspoon at a time, and stir thoroughly. The baking soda will help absorb some of the excess moisture and firm up the slime.
If the slime is still too runny after adding baking soda, you can try adding more contact solution as well. Continue adjusting the amounts until the slime reaches the desired consistency.
3. Slime Not Forming?
If your slime isn’t forming, the issue could be with the type of contact solution you’re using. Ensure that your contact solution contains boric acid, as this is necessary for the slime to form. Without it, the ingredients won’t bind together properly.
Another potential issue could be the ratio of ingredients. If you’ve used too much glue or not enough baking soda, the slime may not come together. Adjust the amounts as needed, and be patient as you mix the ingredients. Sometimes it takes a little extra kneading to get the slime to form.
Variations of 3-Ingredient Slime
One of the best parts about making slime is that there are countless variations you
can try. Here are some popular slime variations that you can create using the same basic ingredients, with just a few tweaks.
1. Fluffy Slime
Fluffy slime is a fan favorite, known for its airy, soft texture. The key to fluffy slime is the addition of shaving cream. To make fluffy slime, follow the basic recipe, but before adding the contact solution, mix in 1 to 2 cups of shaving cream. The more shaving cream you add, the fluffier the slime will be.
Keep in mind that fluffy slime is less stretchy than regular slime, but it’s incredibly fun to play with and has a satisfying, pillowy feel.
2. Glitter Slime
Glitter slime is perfect for anyone who loves a bit of sparkle. To make glitter slime, simply mix glitter into the glue before adding the other ingredients. You can use any color or combination of colors to create a dazzling effect.
Glitter slime is especially popular for parties, gifts, or just adding a little extra fun to your slime-making routine. If you want to make the glitter stand out even more, consider using clear glue as your base.
3. Scented Slime
Scented slime adds an aromatic element to your slime-making experience. To make scented slime, add a few drops of essential oil to your glue mixture. Not only does this give your slime a pleasant fragrance, but it can also have a soothing or energizing effect, depending on the scent you choose.
Lavender and chamomile are great for creating a calming slime, while peppermint or citrus can make a more invigorating slime. You can also combine scents to create your own unique blends.
4. Glow-in-the-Dark Slime
Glow-in-the-dark slime is a fun and spooky variation that’s perfect for Halloween or nighttime play. To make glow-in-the-dark slime, add a few drops of glow-in-the-dark paint or a small amount of glow powder to your glue before mixing in the other ingredients.
Charge the slime under a light for a few minutes, and then watch it glow in the dark! This type of slime is sure to be a hit with kids and makes for a fun science experiment as well.
5. Magnetic Slime
Magnetic slime is an exciting variation that combines slime-making with basic physics. To make magnetic slime, you’ll need iron oxide powder, which can be found online or at specialty stores. Add the iron oxide powder to your glue mixture, and then follow the basic slime recipe.
Once the slime is made, you can use a strong magnet to move and shape the slime, creating fascinating patterns and effects. Magnetic slime is not only fun to play with but also offers a unique learning opportunity about magnetism and materials.
Safety Considerations
Slime-making is generally a safe activity, but it’s essential to follow some basic safety guidelines to ensure that everyone involved has a positive experience.
1. Ensure Child-Safe Ingredients
Always use non-toxic, child-safe ingredients when making slime, especially if young children are involved. While the ingredients in this recipe are generally safe, they should not be ingested. Supervise children during the slime-making process to prevent them from putting slime or any of the ingredients in their mouths.
It’s also a good idea to have children wash their hands before and after playing with slime to prevent the spread of germs and avoid skin irritation.
2. Proper Storage and Handling
To keep your slime fresh and prevent it from drying out, store it in an airtight container. Slime can last anywhere from a few days to a few weeks, depending on how often it’s used and how well it’s stored.
If the slime starts to dry out, you can try adding a few drops of water or contact solution and kneading it back to its original consistency. However, if the slime becomes too stiff or develops an unpleasant odor, it’s best to discard it and make a new batch.
3. Eco-Friendly Disposal
When it’s time to dispose of your slime, do so responsibly. Slime should be thrown in the trash, not down the drain, as it can cause clogs in plumbing. If you’re concerned about the environmental impact, consider using biodegradable materials where possible, and always dispose of slime and its ingredients properly.
Frequently Asked Questions
Here are some common questions and answers related to making 3-ingredient slime without borax.
1. What Can I Use Instead of Contact Solution?
If you don’t have contact solution, you can use saline solution as a substitute. Just make sure it contains boric acid, as this is the key ingredient that activates the slime. Without it, the slime won’t form properly.
Other alternatives include liquid starch or a mixture of baking soda and water, but these may produce slightly different textures than the contact solution-based slime.
2. Can I Make Slime Without Glue?
Yes, you can make slime without glue using alternative ingredients like cornstarch and shampoo. These recipes create a different texture, often referred to as “oobleck” or “gak,” which is still fun to play with but has a more liquid-like consistency.
Another glue-free option is using gelatin or agar-agar to create a more jiggly, jelly-like slime. These alternatives are great for experimenting with different textures and are often easier to clean up.
3. How Long Does Slime Last?
Slime typically lasts for 1 to 2 weeks if stored in an airtight container. The key to longevity is to keep the slime clean and free from contaminants. If the slime becomes too dirty or starts to break down, it’s time to make a new batch.
To extend the life of your slime, avoid exposing it to heat or direct sunlight, as this can cause the slime to dry out or become too sticky. Playing with the slime gently and avoiding rough handling can also help it last longer.
4. What Should I Do if My Child Ingests Slime?
If your child ingests slime, it’s essential to act quickly. Rinse their mouth with water and contact your local poison control center for guidance. While the ingredients in this recipe are generally safe, ingestion can still cause an upset stomach or other mild symptoms.
To prevent ingestion, always supervise young children during slime-making and playtime, and teach them to keep the slime out of their mouths.
5. How Can I Make My Slime Last Longer?
To make your slime last longer, store it in an airtight container and keep it in a cool, dry place. Adding a few drops of contact solution each time you play with it can also help maintain its texture and prevent it from becoming too sticky.
If the slime starts to dry out, try adding a small amount of water or baby oil to rehydrate it. Knead the slime thoroughly after adding any liquids to ensure it stays smooth and stretchy.
6. Can I Add Other Ingredients to My Slime?
Yes! One of the best parts of making slime is that you can customize it with a variety of ingredients. Besides food coloring, glitter, and essential oils, you can add foam beads for a crunchy texture, small plastic toys for a surprise element, or even bits of styrofoam for a snow-like effect.
The possibilities are endless, and experimenting with different add-ins can make your slime-making experience even more enjoyable.
Creative Uses for Homemade Slime
Slime isn’t just for playing—there are countless ways to incorporate slime into other activities, making it a versatile and fun material.
1. Sensory Play
Slime is an excellent tool for sensory play, offering a rich tactile experience that can be both soothing and stimulating. Sensory play with slime can help children develop fine motor skills, improve hand-eye coordination, and explore different textures in a fun and engaging way.
For children with sensory processing issues, slime can be a particularly beneficial activity. The squishy, stretchy texture provides sensory input that can be calming and help regulate emotions. You can also create different types of slime, such as warm or cold slime, to explore temperature variations.
2. Science Experiments
Slime-making is a great way to introduce basic chemistry concepts to children. You can use the process to explain how different ingredients react with each other to create a new substance. For example, you can discuss how the boric acid in the contact solution reacts with the glue to form a polymer, which gives slime its unique properties.
You can also experiment with different ratios of ingredients to see how they affect the slime’s texture and consistency. This type of hands-on learning is not only fun but also reinforces scientific concepts in a memorable way.
3. Craft Projects
Slime can be incorporated into a variety of craft projects, adding an interactive and tactile element. For example, you can use slime to create DIY stress balls by filling balloons with slime and tying them off. These stress balls are great for squeezing and can be customized with different colors and textures.
Another fun project is using slime to make homemade greeting cards. Spread a thin layer of slime on the card, and then add decorations like glitter or small beads. The slime adds a unique, squishy texture that recipients will love.
4. Themed Slime for Parties
Slime can be a great addition to themed parties, especially for kids. You can create slimes that match the party’s theme, such as “unicorn slime” with pastel colors and glitter for a unicorn-themed party, or “alien slime” with green coloring and glow-in-the-dark elements for a space-themed party.
Providing small containers of slime as party favors is a hit with kids and gives them something to take home and enjoy after the party.
Internal Linking Opportunities
For those who want to dive deeper into the world of slime-making, Asako Recipes
offers a comprehensive guide to various slime recipes, including different textures and ingredients that you can experiment with.
If you’re interested in learning how to make slime using other simple household ingredients, the article How do you make homemade slime provides a step-by-step guide to making slime with common items you likely already have at home.
For an even more simplified approach, check out How to make slime with 3 simple ingredients, which offers a quick and easy method for creating slime without any hassle.
Conclusion
Making 3-ingredient slime without borax is a fun, safe, and versatile activity that can be enjoyed by people of all ages. With just a few simple ingredients, you can create endless variations of slime, customize it to your liking, and enjoy hours of tactile fun. Whether you’re a beginner or a seasoned slime enthusiast, this guide has provided you with everything you need to know to get started.
Remember to prioritize safety, store your slime properly, and experiment with different add-ins to make your slime truly unique. From sensory play to creative crafts, the possibilities with slime are endless. Happy slime-making!