Mastering Cake Frosting Techniques: A Comprehensive Guide
When it comes to creating a visually stunning cake, mastering cake frosting techniques is crucial. Whether you are a beginner or a seasoned baker, understanding the nuances of frosting can elevate your cakes from simple desserts to works of art. In this guide, we will explore everything from basic frosting techniques to advanced decoration methods, ensuring you have all the tools and knowledge you need to succeed.
Introduction to Cake Frosting
Cake frosting is not just about adding sweetness; it’s about adding texture, structure, and aesthetic appeal to your cake. Mastering the art of cake frosting involves understanding the different types of frostings, the tools you need, and the techniques that will help you achieve a smooth, flawless finish. Whether you’re decorating a cake for a special occasion or just want to improve your skills, learning how to master frosting can make a huge difference in your baking results.
Cake decorating is an art form, and frosting is your medium. The way you apply frosting to a cake can transform it from a basic dessert into an elegant masterpiece. From buttercream rosettes to fondant-covered cakes, the possibilities are endless once you’ve mastered the essential techniques. Frosting also serves practical purposes, such as sealing in moisture and stabilizing layers, making it a crucial element in cake preparation.
Types of Frosting and Their Uses
Understanding the different types of frostings is the first step in mastering cake frosting techniques. Each type of frosting has its own unique properties and uses, and knowing which to choose for your cake can significantly impact the final result.
Buttercream:
Creamy and versatile, buttercream is the most popular choice for frosting cakes. It’s easy to work with and can be flavored and colored in countless ways. Buttercream is ideal for both filling and covering cakes, and it can be piped into intricate designs or smoothed for a sleek finish. There are several types of buttercream, including American, Swiss, and Italian. Each has its own unique texture and stability, making buttercream one of the most versatile frostings available.
Cream Cheese Frosting:
Ideal for carrot cakes and red velvet cakes, cream cheese frosting offers a tangy flavor that complements richer cakes. Cream cheese frosting is slightly softer than buttercream, making it perfect for rustic finishes or as a filling. Its flavor pairs well with cakes that are less sweet, providing a balanced taste. Because of its softer texture, cream cheese frosting is best used for simple designs and should be refrigerated until just before serving to maintain its consistency.
Ganache:
Made from chocolate and cream, ganache adds a luxurious finish to cakes. It can be poured over cakes for a smooth, glossy finish or whipped for a more textured look. Ganache can also be used as a filling between layers. The ratio of chocolate to cream determines the consistency of the ganache, making it versatile for different purposes. A thicker ganache is ideal for piping or spreading, while a thinner ganache can be used as a glaze.
Whipped Cream Frosting:
Light and airy, whipped cream frosting is perfect for delicate cakes like sponge cakes and chiffon cakes. It’s made by whipping heavy cream with sugar and sometimes a stabilizer, such as gelatin, to help it hold its shape. This frosting is best used for cakes that will be served immediately, as it doesn’t hold up well in warm temperatures or over time. Whipped cream frosting can also be flavored with vanilla, cocoa powder, or fruit purees for added variety.
Royal Icing:
Often used for decorating cookies and intricate cake designs, royal icing dries hard, making it ideal for detailed work. It’s made from egg whites, powdered sugar, and sometimes lemon juice or other flavorings. Royal icing can be piped into delicate patterns or used to create a smooth, glossy surface on cakes. Because it dries firm, royal icing is perfect for creating decorations that need to hold their shape, such as flowers or intricate borders.
Fondant:
A dough-like icing that can be rolled out and draped over cakes for a perfectly smooth finish. Fondant is often used for wedding cakes and other formal occasions because of its polished appearance. It can be molded into shapes, used to cover entire cakes, or cut into decorations. Fondant can also be painted or airbrushed for additional effects. While it provides a flawless finish, some people find its taste and texture less appealing than other frostings, so it’s often paired with a layer of buttercream underneath.
Each of these frostings offers unique benefits and can be used in different combinations depending on the look and taste you want to achieve. For a more detailed breakdown of each frosting type and its best uses, you can refer to this Complete Guide to Frosting.
Tools You Need for Frosting
To achieve professional-looking results, it’s essential to have the right tools at your disposal. Here’s a list of must-have tools for any cake decorator:
Spatulas:
Both straight and offset spatulas are essential for spreading and smoothing frosting. The offset spatula, in particular, allows for precision when working with frosting on the sides of the cake without disturbing the top. The straight spatula is useful for applying large amounts of frosting and smoothing it out evenly. A small offset spatula is also helpful for detailed work, such as smoothing small areas or applying frosting to cupcakes.
Piping Bags and Tips:
These are used for creating intricate designs and borders. Piping tips come in various shapes and sizes, allowing you to create everything from fine lines to elaborate flowers. Reusable piping bags are environmentally friendly and provide better control, while disposable bags are convenient for quick cleanup. Couplers allow you to change tips without changing bags, adding versatility to your decorating options.
Turntable:
A cake turntable allows for easy rotation of the cake, making it easier to apply frosting evenly. A good-quality turntable will spin smoothly and be sturdy enough to support the weight of your cake. It’s an essential tool for achieving a smooth finish on all sides of the cake and for precise piping work.
Icing Smoother/Bench Scraper:
These tools help create a smooth finish on the sides of the cake. A bench scraper is especially useful for taller cakes, as it allows you to smooth the frosting in one continuous motion. An icing smoother with a handle can provide more control, especially for beginners.
Comb Scrapers:
Used to add texture to the sides of the cake. Comb scrapers come with different patterns, such as ridges or waves, which can be pressed into the frosting to create interesting effects. These tools are easy to use and can quickly transform a plain frosted cake into something more visually appealing.
Cake Leveler:
Ensures that your cake layers are even, which is crucial for a smooth frosting application. An even cake layer provides a stable base for stacking, and a level cake is easier to frost. A cake leveler can also be used to split a cake into multiple layers for filling.
Cooling Racks:
While not directly used for frosting, cooling racks are essential for ensuring your cakes cool evenly. Cooling your cakes on a rack prevents the bottoms from becoming soggy, which can affect the texture and stability of your cake when frosting.
Having the right tools not only makes the process easier but also ensures a more polished result. Investing in quality tools can make a significant difference in your cake decorating, and as you gain experience, you’ll discover which tools are your favorites. For more tips on essential cake decorating tools, check out Cake Frosting Tips.
How to Prepare Your Cake for Frosting
Preparation is key when it comes to frosting a cake. Proper preparation ensures that your cake is stable, level, and ready for a smooth and even application of frosting. Here’s how to prepare your cake to ensure a smooth and even application of frosting:
Cool the Cake:
Before applying any frosting, make sure your cake is completely cooled. This prevents the frosting from melting and becoming too soft. Cooling also allows the cake to firm up, making it easier to handle without crumbling. It’s recommended to bake your cake the day before and let it rest overnight in the refrigerator to ensure it’s fully cooled and stable.
Trim and Level:
Use a cake leveler or a serrated knife to trim any domed tops from your cake layers. Even layers ensure a more stable cake and a smoother finish. When leveling, be sure to check for any uneven spots and trim as necessary. An even surface is crucial for stacking layers and achieving a professional look.
Crumb Coat:
A crumb coat is a thin layer of frosting applied to seal in crumbs. This layer acts as a base for the final layer of frosting and ensures a smooth finish. Apply a thin layer of frosting over the entire cake, making sure to cover all the crumbs. Once applied, chill the cake for about 20 minutes to set the crumb coat before applying the final layer.
Choose the Right Cake Board:
The cake board should be sturdy enough to support the weight of the cake. It also provides a surface for easy rotation while frosting. Choose a board that is at least 2 inches larger than the cake’s diameter to allow for easy handling and decorating. You can also cover the board with decorative paper or fondant to match the cake’s theme.
Torte the Layers:
If you want to add fillings between the layers, consider torting the cake. This involves slicing each layer horizontally to create multiple thinner layers. Filling these layers with complementary flavors or textures adds depth to your cake and enhances its overall appeal.
Apply Simple Syrup:
Brushing your cake layers with simple syrup (a mixture of equal parts sugar and water) helps keep the cake moist and adds flavor. This is especially important if you plan to make your cake in advance. The syrup can be flavored with extracts, liqueurs, or fruit juices to complement the cake and frosting flavors.
Chill the Cake:
Once your cake is filled, stacked, and crumb-coated, it’s helpful to chill it before applying the final layer of frosting. A chilled cake is firmer and easier to frost, allowing for a smoother finish. After applying the crumb coat, chill the cake for at least 30 minutes to set the frosting.
Basic Frosting Techniques
Once your cake is prepared, it’s time to apply the frosting. These basic frosting techniques will help you achieve a professional-looking finish:
Applying a Crumb Coat:
Start by applying a thin layer of frosting all over the cake. This seals in any crumbs and provides a smooth base for the final layer of frosting. Use an offset spatula to spread the frosting evenly, and be sure to cover the entire surface of the cake, including the sides. Once the crumb coat is applied, chill the cake for 15-20 minutes to set the frosting.
Smoothing the Frosting:
Use a spatula or icing smoother to spread the frosting evenly over the cake. Rotate the cake on a turntable for easier access to all sides. Start with a generous amount of frosting on the top of the cake, spreading it outwards towards the edges. Then, move to the sides, applying frosting in sections and smoothing it as you go. For a perfectly smooth finish, hold an icing smoother at a slight angle against the side of the cake and rotate the turntable. Keep the smoother steady as you rotate, applying gentle pressure to achieve an even surface.
Creating a Smooth Finish:
For a perfectly smooth finish, hold an icing smoother against the side of the cake and rotate the turntable. Repeat until the frosting is smooth and even. If you see any imperfections, apply a small amount of frosting and smooth it out. Use a bench scraper for taller cakes to create a seamless finish on the sides. For the top, use a straight spatula, smoothing from the center outwards.
Piping Basic Designs:
Piping is a simple way to add decoration to your cake. Start with basic designs like swirls, rosettes, and dots before moving on to more complex patterns. Fill your piping bag with frosting and choose a tip that suits your design. Practice your piping on a piece of parchment paper before applying it to the cake. When piping, maintain even pressure on the bag to ensure consistent lines or shapes.
Fixing Mistakes:
Don’t worry if you make a mistake; frosting is forgiving. If you need to fix an area, simply scrape off the frosting with a spatula, smooth the surface, and reapply. You can also add additional decorations, such as flowers or borders, to cover any imperfections.
Common Mistakes in Frosting and How to Avoid Them
Even with the best preparation, mistakes can happen. Here are some common frosting mistakes and how to avoid them:
Overmixing or Undermixing Frosting:
Overmixed frosting can become too soft, while undermixed frosting can be lumpy. Mix your frosting until it reaches the desired consistency. Be cautious not to overbeat buttercream, as it can cause air bubbles to form. If using a stand mixer, mix on low speed to avoid incorporating too much air.
Uneven Layers:
Uneven cake layers can cause the frosting to appear lopsided. Always trim and level your cake layers before frosting. When stacking the layers, check from all angles to ensure they are even. You can adjust the positioning of the layers slightly before applying the final frosting.
Air Bubbles in the Frosting:
Air bubbles can be a common issue, especially with buttercream. To avoid this, mix the frosting on low speed and tap the bowl on the counter to release any trapped air. If bubbles form while applying the frosting, smooth them out with a spatula or pop them with a toothpick.
Frosting Too Soft or Too Stiff:
If your frosting is too soft, chill it in the refrigerator for a few minutes. If it’s too stiff, add a small amount of liquid (milk or cream) to achieve the right consistency. It’s essential to strike the right balance, as too soft frosting won’t hold its shape, and too stiff frosting can be challenging to spread smoothly.
Melting Frosting:
Working in a warm environment can cause frosting to melt and become difficult to work with. If you notice your frosting starting to soften, place it in the refrigerator for a few minutes to firm up. Keep your cake in a cool place while working, and avoid handling it too much to prevent the heat from your hands from affecting the frosting.
Frosting Won’t Adhere to the Cake:
If your frosting isn’t sticking to the cake, it could be due to a lack of crumb coat or a too-smooth surface. Apply a crumb coat and ensure the cake is slightly tacky before applying the final layer of frosting. You can also brush the cake with a thin layer of simple syrup to help the frosting adhere better.
Colors Bleeding or Fading:
If you’re using multiple colors of frosting, be aware that some colors can bleed into others over time, especially if the cake is stored in a warm environment. To prevent this, use high-quality gel food coloring, and avoid placing dark colors directly next to light colors. For the best results, apply the colors as close to serving time as possible.
Advanced Frosting Techniques
Once you’ve mastered the basics, it’s time to move on to more advanced frosting techniques. These techniques can add sophistication and creativity to your cake designs, making them stand out:
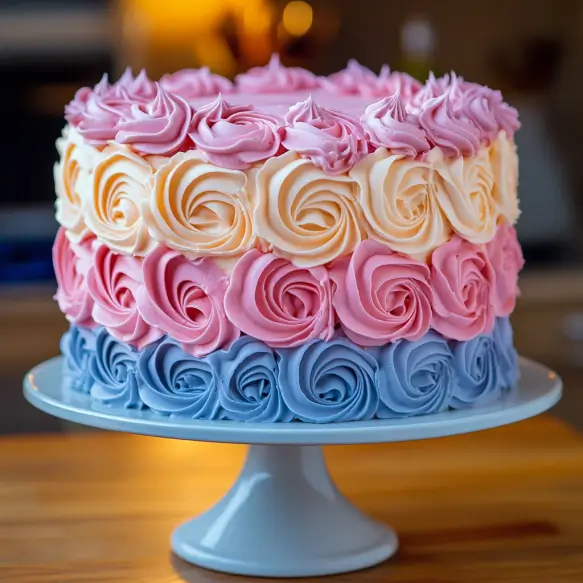
Ombre Effects:
Ombre frosting involves blending different shades of the same color to create a gradient effect. This technique adds depth and interest to your cake. Start with the darkest shade at the bottom and gradually work your way up to the lightest shade. Use an icing smoother to blend the colors where they meet, creating a seamless transition.
Textured Frosting:
Use comb scrapers or the back of a spoon to create textured patterns like ruffles, waves, and basketweave on the sides of your cake. Textured frosting adds dimension and can be used to complement the theme of the cake. For example, ruffled frosting can give a cake a soft, romantic look, while a basketweave pattern is perfect for a rustic or garden-themed cake.
Stenciling:
Stenciling involves placing a stencil over the cake and applying frosting or powdered sugar to create intricate patterns. This technique is great for adding detailed designs without the need for advanced piping skills. Choose a stencil that matches the theme of your cake, and hold it firmly against the frosting before applying the decoration. Gently lift the stencil away to reveal the design.
Multi-Color Designs:
Use multiple colors of frosting to create vibrant and eye-catching designs. This technique works well for theme cakes and special occasions. For example, you can create a rainbow effect by piping different colors in layers or use contrasting colors to highlight specific details on the cake. When using multiple colors, be mindful of how they interact and choose colors that complement each other.
Marbling:
Marbling is a technique that involves swirling two or more colors of frosting together to create a marbled effect. This can be done on the cake’s surface or on piped decorations. To achieve a marbled look, apply different colors of frosting in patches, then use a spatula or toothpick to gently swirl the colors together. Be careful not to overmix, as this can muddy the colors.
Watercolor Effect:
The watercolor effect is created by applying dabs of different colors of frosting to the cake and then smoothing them out to blend the colors. This technique can give your cake a soft, artistic look. Start with a base layer of frosting, then apply small amounts of colored frosting in random spots. Use a spatula to spread and blend the colors, creating a watercolor-like effect.
Drip Cakes:
Drip cakes are decorated with a ganache or glaze that is dripped down the sides of the cake. The effect is both elegant and dramatic, making it a popular choice for special occasions. To create a drip effect, start with a chilled cake and a ganache that is slightly warm but still thick enough to hold its shape. Use a spoon or piping bag to carefully pour the ganache around the edge of the cake, allowing it to drip down the sides.
Cake Decorating with Frosting: Creative Ideas
Now that you have the techniques down, it’s time to get creative. Here are some ideas to inspire your next cake decorating project:
Combining Frosting with Fondant:
Use fondant for a smooth finish and add buttercream or royal icing decorations for contrast. Fondant provides a flawless surface that can be painted, airbrushed, or adorned with intricate decorations. Pairing it with buttercream or royal icing allows for more detailed and personalized designs.
Edible Flowers and Decorations:
Incorporate edible flowers, sprinkles, and other decorations into your design for a unique and personalized touch. Fresh or edible flowers can be used to add a natural element to your cake, while sprinkles and edible glitter can bring a touch of fun and whimsy. Be sure to use flowers that are safe for consumption and free from pesticides.
Gold Leaf and Metallic Accents:
Add a touch of luxury to your cake with gold leaf or metallic accents. These can be applied directly to the frosting or fondant for a striking effect. Metallic accents, such as silver or rose gold, can be used to highlight specific areas of the cake or to create an overall elegant look. Applying gold leaf requires patience and precision, but the results are stunning.
Theme Cakes:
Whether it’s a birthday, wedding, or holiday, theme cakes allow you to get creative with your designs. Use a combination of frosting techniques to bring your theme to life. For example, for a beach-themed cake, you could use blue ombre frosting to represent the ocean, topped with fondant seashells and edible sand made from crushed cookies. For a holiday cake, consider using textured frosting to create the look of a snowy landscape, adorned with fondant trees and decorations.
3D Designs:
Take your cake decorating to the next level with 3D designs. This involves creating shapes and figures out of fondant, gum paste, or modeling chocolate and attaching them to your cake. You can also carve the cake itself into a 3D shape, such as a car, animal, or building. 3D designs require more advanced skills and planning, but they can make your cake the centerpiece of any event.
For a detailed guide on how to incorporate these techniques into a themed cake, refer to the Ultimate Guide to Birthday Cake.
Troubleshooting Frosting Problems
No matter how prepared you are, frosting issues can still arise. Here’s how to troubleshoot some common frosting problems:
Frosting Too Thick/Thin:
If your frosting is too thick, add a small amount of liquid and mix until it reaches the desired consistency. If it’s too thin, add more powdered sugar or chill it to thicken. It’s important to find the right balance, as too thick frosting can be difficult to spread smoothly, while too thin frosting may not hold its shape.
Melting Frosting:
To prevent frosting from melting, work in a cool environment and chill your cake between frosting layers. If you’re working in a warm kitchen, consider chilling your tools, such as spatulas and piping bags, before use. Avoid overhandling the cake, as the heat from your hands can cause the frosting to soften.
Frosting Won’t Adhere to the Cake:
If your frosting isn’t sticking to the cake, it could be due to a lack of crumb coat or a too-smooth surface. Apply a crumb coat and ensure the cake is slightly tacky before applying the final layer of frosting. You can also brush the cake with a thin layer of simple syrup to help the frosting adhere better. If you’re using fondant, a thin layer of buttercream underneath can help it stick to the cake more effectively.
Colors Bleeding or Fading:
If you’re using multiple colors of frosting, be aware that some colors can bleed into others over time, especially if the cake is stored in a warm environment. To prevent this, use high-quality gel food coloring, and avoid placing dark colors directly next to light colors. For the best results, apply the colors as close to serving time as possible.
Cracks in Fondant:
If your fondant cracks or tears while covering a cake, it may be too dry or thick. Knead in a small amount of shortening or glycerin to make it more pliable. If the crack is small, you can smooth it out with a bit of water or a fondant smoother. For larger cracks, consider covering the area with decorations, such as fondant flowers or other embellishments.
FAQs About Cake Frosting
How long can frosted cakes be stored?
Frosted cakes can be stored at room temperature for 2-3 days or in the refrigerator for up to a week. For longer storage, consider freezing the cake. Wrap it well in plastic wrap and store it in an airtight container before freezing. When ready to serve, thaw the cake in the refrigerator overnight.
Can you frost a warm cake?
It’s best to wait until the cake is completely cool before frosting. Frosting a warm cake can cause the frosting to melt and slide off, leading to an uneven and messy finish. If you’re in a hurry, you can speed up the cooling process by placing the cake in the refrigerator for 30 minutes before frosting.
How to make frosting less sweet?
To reduce the sweetness, you can add a pinch of salt or a few drops of lemon juice to balance the flavor. Another option is to use less powdered sugar and add more butter or cream cheese to the recipe. For chocolate frostings, consider using unsweetened cocoa powder or dark chocolate to reduce sweetness.
What’s the best way to color frosting?
Use gel food coloring for vibrant colors without altering the consistency of the frosting. Gel colors are concentrated, so a little goes a long way. Start with a small amount and gradually add more until you achieve the desired shade. For deep colors like red or black, make the frosting a day in advance, as the color will deepen over time.
How do I prevent my frosting from crusting?
Buttercream frosting tends to crust over if exposed to air for too long. To prevent this, keep the frosting covered with plastic wrap or a damp cloth when not in use. You can also add a small amount of corn syrup or glycerin to the frosting recipe to help it stay soft and spreadable.
Can I use regular butter instead of unsalted butter in my frosting?
While you can use regular butter, it’s best to use unsalted butter to control the saltiness of your frosting. If you only have salted butter, you can reduce or omit any additional salt called for in the recipe. Keep in mind that the flavor may differ slightly from using unsalted butter.
How do I fix grainy frosting?
Grainy frosting can occur if the sugar isn’t fully dissolved or if the frosting is overbeaten. To fix this, try warming the frosting slightly over a double boiler while stirring continuously. Once the sugar dissolves, cool the frosting and re-whip it until smooth.
Conclusion
Mastering cake frosting techniques takes practice, patience, and a willingness to experiment. By understanding the different types of frostings, using the right tools, and following the techniques outlined in this guide, you’ll be well on your way to creating beautifully decorated cakes that taste as good as they look.
For further inspiration and tips on creating delicious desserts, check out some of the other resources available on Asako Recipes.